Published on: 2025-05-04
Adding a Synology NAS NFS Share to Proxmox
Estimated time to read: 2 minutes
Create & Configure NFS
Enable NFS
-
Log into the Synology NAS with an admin account
-
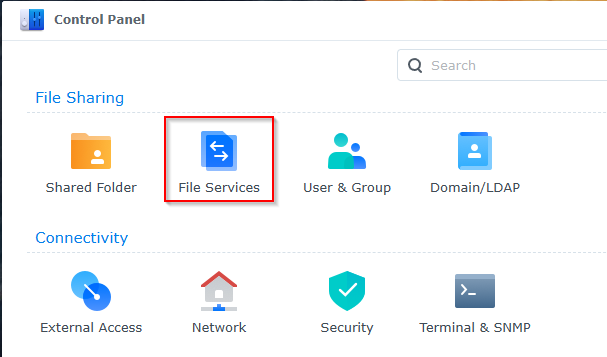
Open the Control Panel
-
Click on File Services
-
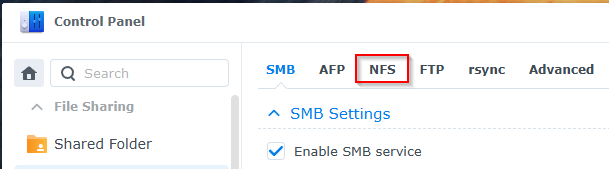
Click on the NFS tab
-
Click on the Enable NFS checkbox if it's not already enabled. Click Apply.
Create Shared Folder
-
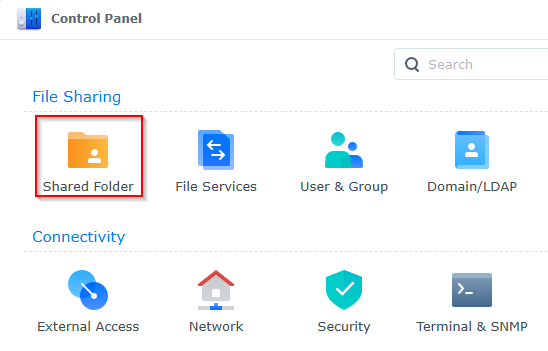
Navigate to Control Panel > Shared Folder
-
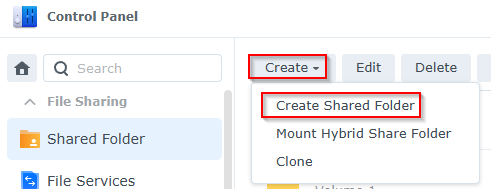
Click on Create -> Create Shared Folder
-
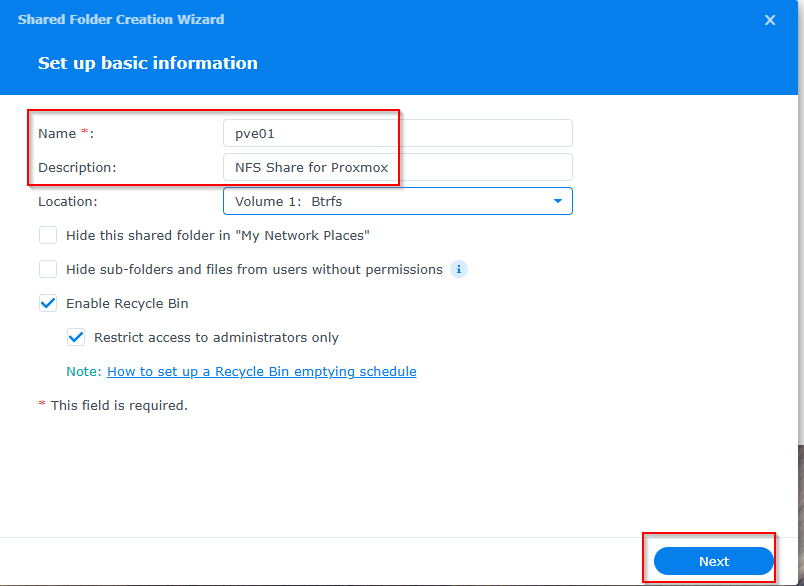
Enter a name and description. Click Next
-
Enable encryption if desired. Click Next
-
Leave the data checksum item unchecked. Click Next
-
Review the Confirm Settings screen and click Next
-
Configure the user permissions and click Apply
-
Select the new Share and click Edit
-
Click on the
NFS Permissionstab
-
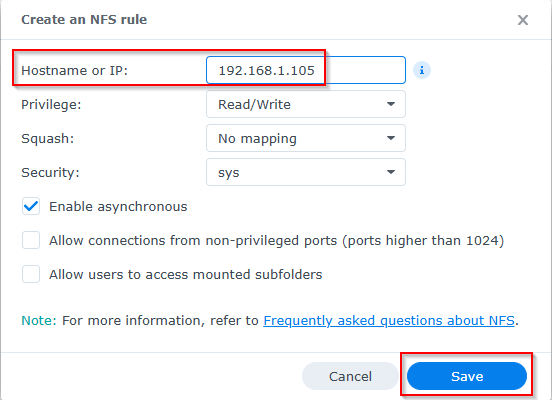
Click on the Create button
-
Enter the IP/hostname of the Proxmox server that will be using the share. The other values can be left as is. Click Save.
-
Repeat for any additional servers. Note the value of the Mount Path at the bottom of the window. Click Save again
Configure Proxmox
- Login to Proxmox
-
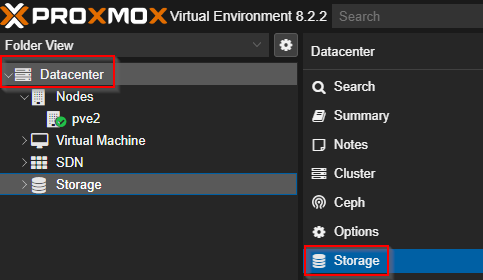
Select Datacenter, then Storage
-
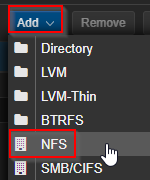
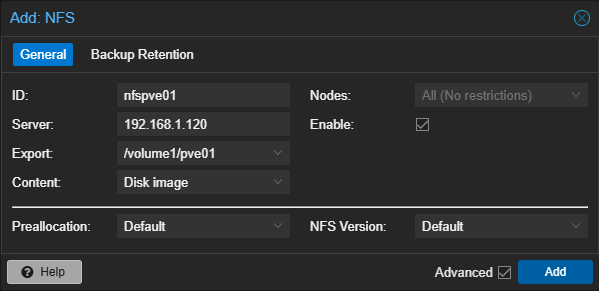
Click on Add -> NFS
-
Fill the details in the window that appears. The ID will be the name of the share in Proxmox. The server is the IP/hostname of the Synology NAS. The Export is the Mouth Path mentioned earlier (the dropdown should populate with available shares). Configure the other items as required and click Add.
-
The NFS Share is now available for use on the Proxmox host. Repeat for other NFS Shares as required.
/volume1/pve01