Published on: 2019-01-14
Virtual Appliance Install
Estimated time to read: 1 minute
Installation & Configuration of Virtual Appliance
- Deploy appliance as normal and boot
- Login to the console with the default credentials (root/default)
- Run the config command
-
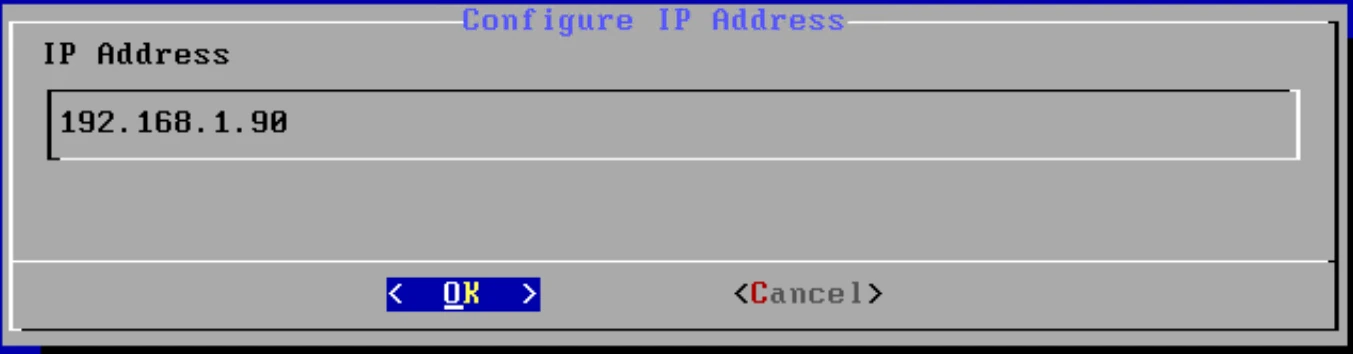
Set an IP address for the management interface or leave as DHCP
-
Access the management interface on the new set IP address (https://
/) with the default management credentials (admin/admin) - Start the Setup Utility
-
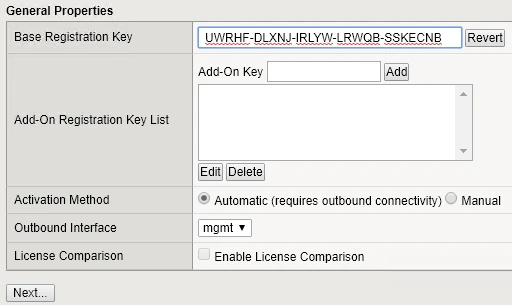
Click the Activate License button and fill in the details in the form
-
Accept the License Agreement
- The configuration process will start. When it is finished click the Continue button
- Continue the Setup wizard to completion
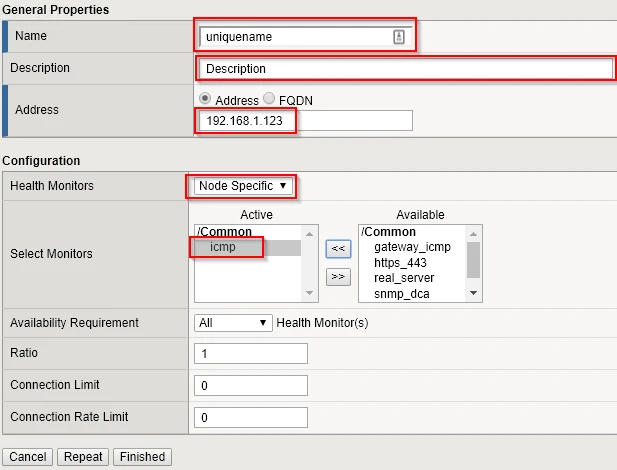
Create a Node
- Navigate to Local Traffic > Virtual Servers > Nodes
- Click on Create
-
Enter details
-
Click on the Finished button